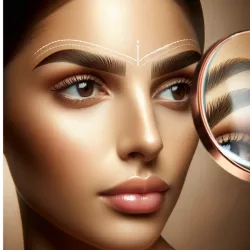
Contour makeup can be challenging to master without proper guidance. Follow these easy steps to learn how to do contour makeup like a pro. With the right techniques and tools, you can achieve a sculpted look that enhances your natural features.
Key Takeaways:
- Contour makeup is a technique that can enhance your bone structure and features.
- Start with the right products and tools, such as a bronzer and concealer.
- Prep your skin by massaging and moisturizing before applying contour makeup.
- Define and highlight your desired features using light and dark shades.
- Blend and set your contour for a seamless finish that lasts all day.
Understanding Contour Makeup
Contour makeup has been a staple technique in the beauty industry since the 1930s. It involves the strategic use of different shades of makeup to create an optical illusion that enhances your bone structure and features. While contouring can seem intimidating, it’s actually a versatile technique that can be tailored to achieve a range of looks, from soft and subtle to bold and dramatic. With the right tips and tricks, anyone can learn how to contour like a pro.
Contouring is all about creating shadows and highlights to sculpt and define your face. By using a darker shade to create depth and a lighter shade to emphasize the high points of your face, you can achieve a more chiseled and structured look.
“Contouring allows you to shape and enhance your facial features, bringing out your best features and creating a more three-dimensional look.”
Whether you have a round face, square face, or oval face, contouring can be customized to suit your unique features. By understanding your face shape and using the right techniques, you can achieve a contour that flatters your natural beauty.
Contour Makeup Tips for Beginners
If you’re new to contouring, here are some expert tips to help you get started:
- Choose the right products: Opt for a contour shade that is about two shades darker than your skin tone and a highlight shade that is one to two shades lighter.
- Blend, blend, blend: The key to a natural-looking contour is seamless blending. Use a damp beauty sponge or a dense brush to blend the products into your skin for a flawless finish.
- Try different techniques: Contouring is a personal art, and what works for one person may not work for another. Experiment with different techniques, such as cream contour or powder contour, to find what suits you best.
- Practice makes perfect: Don’t be discouraged if your first attempts at contouring don’t turn out perfectly. Like any skill, contouring takes practice. Keep trying and refining your technique, and you’ll improve over time.
With these beginner’s tips and a bit of practice, you’ll soon become a contouring pro, enhancing your natural beauty and creating stunning makeup looks.
Essential Products and Tools for Contouring
To achieve a flawless contour, you’ll need the right products and tools. Start with your go-to skincare and foundation. For the actual contouring, you’ll need a bronzer that is two shades deeper than your skin tone and a concealer that is one to two shades lighter. Powder-based products are more forgiving for beginners, while cream products can give a fresher look.
Some recommended contouring products and tools include:
| Contouring Products | Contouring Tools |
|---|---|
| Beautyblender | |
| Dense angled brush |
Remember, the key to a successful contour is choosing the right shades and textures for your skin type. Experiment with different products and tools to find what works best for you.
Why Choose Powder-based Products?
For beginners, powder-based products are often recommended for contouring. They are more forgiving and easier to blend, making them perfect for those just starting their contouring journey. Additionally, powder products have a more natural finish, providing a subtle sculpting effect without appearing too heavy or cakey.
Tip: When using powder-based contour products, apply them with a light hand and build up the intensity gradually to maintain control and achieve a seamless finish.
Try Cream Products for a Fresher Look
If you prefer a dewy, fresh-faced look, consider using cream-based contour products. Cream formulations offer a more radiant and luminous finish, giving your contour a natural-looking appearance. They also tend to blend effortlessly into the skin, creating a seamless and well-defined sculpted effect.
Tip: When using cream-based contour products, apply them with your fingers or a damp beauty sponge for a smoother application and easier blending.
By having the right contouring products and tools in your arsenal, you can confidently create a beautifully sculpted look that enhances your facial features.
Prepping the Skin
Before you start applying contour makeup, it’s crucial to prepare your skin for the flawless look you desire. Follow these steps to ensure a smooth and radiant canvas for your contouring masterpiece.
Step 1: Facial Massage
Begin with a quick facial massage to promote lymphatic drainage and reduce puffiness. This relaxation technique not only helps your skin look and feel rejuvenated but also creates a perfect base for your contour makeup. Consider using a face massaging tool like Gua Sha & Jade roller or the ReFa CAXA M1 for an extra luxurious experience.
Step 2: Skincare Routine
After your facial massage, continue with your regular skincare routine. Cleanse your face thoroughly to remove any dirt or impurities. Then, apply your favorite moisturizer to hydrate and nourish your skin. Don’t forget to use a gentle eye cream to minimize any puffiness or dark circles.
Step 3: Apply Foundation
Once your skincare products have absorbed into the skin, it’s time to apply your foundation. Choose a foundation that matches your skin tone perfectly. Apply it evenly using a makeup sponge or brush, focusing on covering any blemishes or unevenness.
Step 1: Define
In contour makeup, defining the areas of your face that you want to enhance is the first step. By strategically applying contour products, you can create dimension and highlight your best features. The key areas for contouring include the hairline, cheekbones, nose, and jawline.
When contouring your hairline, use a light touch and sweep the product in a back and forth motion along the edges. Start from the temples and move towards the center of your forehead, gradually softening the touch.
To accentuate your cheekbones, smile slightly and use the apples of your cheeks as a guide. Softly sweep the contour product just below the cheekbones, blending it towards the temples. This technique adds depth and definition to the face.
When contouring your nose, apply the product along the sides, creating subtle shadows to slim down the nose. Blend it gently for a seamless finish.
Lastly, contour your jawline by shading lightly under and slightly above the jawline. This helps to define the jaw and create a more sculpted appearance.
Remember, the key to successful contouring is using a light hand and blending well to achieve a natural-looking effect that suits your face shape.
| Face Shape | Contouring Technique |
|---|---|
| Round | Create the illusion of sharper cheekbones by adding contour just below the apples of your cheeks. Concentrate on the outer edges of the face to create a more angular appearance. |
| Square | Soften the angles of a square face by contouring along the jawline. Focus on blending the contour product seamlessly to create a more rounded appearance. |
| Oval | Enhance the definition of an oval face shape by contouring along the hairline and jawline. This technique adds depth and dimension to the face, creating a more balanced look. |
Step 2: Find Your Light
Once you have defined the areas of your face with contour, it’s time to add highlight to create contrast and enhance your sculpted look. Remember, flawless contouring is all about balance and playing with light and shadow. By strategically placing highlight on the high points of your face, you can further accentuate your features.
To achieve this, apply a few dots of a lighter concealer to the following areas:
- The bridge of your nose
- The center of your forehead
- The tops of your cheekbones
- Above your cupid’s bow
By focusing the highlight on these areas, you can create a luminous glow and draw attention to your best features. The contrast between the highlighted areas and the contoured areas will enhance the overall effect of your makeup.
Remember to blend the highlight seamlessly into your foundation for a natural-looking finish. Use a blending brush or a damp Beautyblender to ensure a smooth and even application.
For a visual reference of the highlighted areas, refer to the image below:
Expert Tip:
When applying the highlight, use a light hand and build up the intensity gradually. It’s easier to add more product than to take away excess highlight. Plus, starting with a subtle effect gives you more control over the final result.
| Benefits of Highlighting | Common Mistakes to Avoid |
|---|---|
|
|
Step 3: Blend It Out
To achieve a flawless contour and highlight, it’s crucial to blend them seamlessly into your foundation. This step ensures a natural and cohesive look that enhances your facial features. Whether you prefer using a wet Beautyblender or a dense angled brush, the key is to employ the right technique. Follow these contour makeup tutorial tips and contouring techniques to perfect your blending:
- Wet Beautyblender sponge : Moisten your Beautyblender with water and squeeze out any excess. Gently tap the sponge in circular motions to melt the makeup into your foundation. Start from the outer edges of the contoured areas, blending towards the center. This technique allows the colors to blend seamlessly, avoiding harsh lines.
- Dense Angled Brush: If you prefer using a brush, choose a dense angled brush for precise application. Sweep the brush back and forth in a windshield wiper motion to blend the contour and highlight. Start with light pressure and gradually build intensity, ensuring a seamless transition between the makeup and your foundation.
Take your time during the blending process to achieve a flawless and natural finish. Remember to check the lighting to ensure that your contour and highlight appear consistent in different environments. Now that you have mastered the art of blending, move on to the next step of your contour makeup tutorial – locking in your look with setting powder.
Step 4: Lock In Your Look
To ensure your contour makeup stays in place all day, follow these contour makeup tips and use the right contouring products and tools.
Choosing the Right Setting Powder
One essential product for setting your contour is a high-quality setting powder. Consider your skin type when choosing the amount of powder to use:
| Skin Type | Recommended Amount of Setting Powder |
|---|---|
| Dry Skin | Less powder |
| Oily Skin | More powder |
| Normal Skin | Moderate amount of powder |
Applying Setting Powder
After completing your contour, take a powder puff and dip it into the setting powder. Gently press the powder puff onto the areas of your face where you applied the contour. This will help set the makeup and prevent it from smudging throughout the day.
If you prefer a more natural finish, you can also use a large, fluffy brush to lightly dust the setting powder over your contour. This will help blend the contour seamlessly into your skin.
Remember to tap off any excess powder before applying it to your face to avoid over-powdering.
With these contour makeup tips and the right contouring products and tools, you can lock in your look and enjoy a flawlessly contoured face all day long

Top Tips for Perfecting Your Contour
When it comes to contour makeup, following expert tips can make all the difference in achieving a flawless look. Here are some essential contour makeup tips to take your makeup game to the next level:
- Start with a light hand: Contouring is all about subtlety. Begin with a small amount of product and gradually build up the intensity. You can always add more, but it’s difficult to remove excess contour.
- Blend thoroughly: Blending is the key to achieving a seamless and natural-looking contour. Take your time to blend the contour and highlight products well into your skin. A wet Beautyblender or a dense angled brush can help achieve a flawless blend.
- Use natural light: To ensure your contour looks natural and well-blended, check your makeup in natural light. This will give you a more realistic perspective and help you make any necessary adjustments.
Practice makes perfect when it comes to contouring. Don’t be discouraged if you don’t achieve the desired result on your first attempt. With time and practice, you’ll become more comfortable and confident in your contouring skills.
Remember, everyone’s face is unique, so feel free to adapt these tips to suit your individual features and preferences. With these expert tips, you’ll be on your way to achieving flawless and professional-looking contour makeup.
Conclusion
Contour makeup is a powerful technique that can completely transform your appearance by adding depth and dimension to your facial features. By following the step-by-step guide and practicing regularly, even beginners can achieve a flawless contour that enhances their natural beauty. Don’t be afraid to experiment and adapt the techniques to suit your unique face shape. Remember, with time and patience, you’ll be able to create sculpted looks that make your features stand out.
When diving into the world of contouring, it’s important to have the right products and tools at your disposal. Choose high-quality bronzer shades that are two shades deeper than your skin tone and concealer shades that are one to two shades lighter. Recommended products such as e.l.f. Primer Infused Bronzer – Forever Sunkissed and the Maybelline Fit Me Natural Coverage Concealer can help you achieve the desired effects.
Whether you have an oval, round, or square face shape, there are contouring techniques that can highlight your best features. Adapt the placement of the contour and highlight to create the illusion of defined cheekbones, a softer jawline, or a more sculpted face. Remember, practice makes perfect, so don’t give up if it takes a few tries to master the art of contouring. Keep practicing, and you’ll soon be able to achieve professional-level results.
FAQ
What is contour makeup?
Contour makeup is a technique that uses different shades of makeup to create an optical illusion that enhances your bone structure and features.
Can anyone learn how to do contour makeup?
Yes, with the right tips and tricks, anyone can learn how to contour like a pro.
What products and tools do I need for contouring?
For contouring, you’ll need a bronzer that is two shades deeper than your skin tone and a concealer that is one to two shades lighter. Recommended products include the Buxom Staycation Vibes Primer-Infused Bronzer and the Kosas Revealer Concealer.
How do I prep my skin before applying contour makeup?
Start with a quick facial massage to promote lymphatic drainage and reduce puffiness. Follow with your regular skincare routine, including moisturizer. Apply your foundation as you normally would.
How do I define the areas of my face for contouring?
Common areas to enhance include the hairline, cheekbones, nose, and jawline. Use a light touch and sweep the product in a back and forth motion along your hairline. Shade lightly under and slightly above the jawline.
How do I add highlight to my contour?
Apply a few dots of a lighter concealer to areas like the bridge of your nose, center of your forehead, tops of your cheekbones, and above the cupid’s bow.
How do I blend out my contour and highlight?
Blend using a wet Beautyblender or a dense angled brush. Tap the sponge in circular motions or sweep the brush back and forth for an even blend.
What do I need to set my contour makeup?
Use a setting powder and a powder puff to set your contour makeup. Consider your skin type when choosing the amount of powder to use.
Are there different contouring techniques for different face shapes?
Yes, for different face shapes, you may need to focus on specific areas to create the desired effect. For example, for a round face shape, focus on creating sharper cheekbones, while for a square face shape, contour along the jawline to soften the angles.
What are some additional tips for perfecting contouring?
Start with a light hand, blend thoroughly, and use natural light to check your contour for a more realistic look. Practice is key, so don’t be discouraged if it takes a few tries to master the technique.
How can contour makeup enhance my facial features?
Contouring adds depth and dimension to your facial features, creating a sculpted look that enhances your natural beauty.